Tail section 3
Now with the stabilizer and fins on next step is to hinge and set up the control cables. I thought a lot about the hinges, the plans ask for Kevlar hinges glued to the surfaces. I was not keen on that idea as once glued the controls could not be removed. Metal hinges would be too difficult to secure easily to foam so I chose plastic hinges specifically 3D printed hinges. Each hinge is 60mm wide and sits 50mm deep into the foam. I load tested the hinge to 100kg per hinge. I needed a way to accurately drill the hinge slots and came up with the device below.
This was placed over the surface and clamped so it would not move then I used a 5mm drill bit to make one long slot 60mm wide and 50mm deep. This worked very well. I made 4 hinges for each rudder and 12 hinges for the elevator. Once in place I started on the control cables. To remove the use of pulleys I used push bike outer brake cable to house the steering cable. Each end of the outer required an anchor point to slot into. Below are pictures of the cable and anchor points for both rudder and elevator.
The downwards elevator control required some thought. There was not enough room to place a cable as the bend radius would be too small to allow smooth movement. Also the cable outer needs to be as far away from the joystick as possible to allow for the movement of the rudder. If it's too close, as you turn the rudder the elevator control cables would pull tight. In the end I needed to use a pulley to guide the cable.
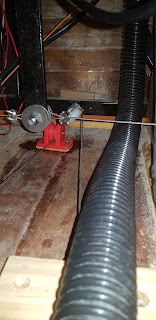
Sadly the pulley did not push the cable down far enough as it would hit the rudder cables SO I designed and printed a secondary pulley to help keep the cable down low.
Connecting the cable to the rudder was very simple, the picture show it all.
The elevator had one extra step than the rudders as the cable passed through the stabilizer. A hole at the correct angle was drilled and a outer cable glued in place.
This is the elevator control cables at the joystick.
Even after glassing everything in place the rear end had too much flex. It would push back and forth approximately 100mm. Some sort of bracing was required. I used the same wire setup that was used to brace between the cockpit and the duct. I connected a wire between the upper rear tail support and the rear spar supports and crossed them diagonally. This will also give more support when pulling back on the elevator.
When the joystick is released the elevator hits the rudders so I glued a peice of timber behind the joystick to stop the elevator dropping so far.


Comments
Post a Comment